Showing posts with label magnets. Show all posts

Thursday, September 18, 2014

Bottle Cap Magnets Revamped

Jumping right in today!  Some of you mentioned that my Bottlecap Magnet post was a little confusing!  I don't blame you!  I created that post because I was confused myself.  I was testing different products to see which would work the best.  So now that I have it down to an art I can share a better step by step for you. 


NOTE:  The supplies links are as always from Amazon, but I encourage you to find the best prices!  I found a lot of my supplies at Hobby Lobby for 50% off!  If they had an affiliate program I would be there in a heart beat!  My hubs brought me home an application for them, but we agreed I may spend more than I make!


Supplies

Bottle Caps
1" hole punch
Scrapbook paper
bits and bobs
(I use a lot of charms and earrings)
magnets
E600
GOJO (optional)


Step one is to gather your supplies of course!  Check out the tips at the end to make this a success!


You can use the link above to order bottle caps from Amazon (100 for $7 and I paid $5 for 20 at HL).  It will take you to a silver bottle cap, but you can find all different colors!


You can buy bottle caps of recycle the ones you get from glass bottles.

Step two is to punch a bunch of papers!  You will need a 1" hole punch.  They will fit perfectly into your 1" bottle caps, so no need to worry about trimming or cutting perfectly!
 
Hole punch from Paper Studios.  It is a great hole punch, but I prefer the ones from EK Tools.


Step Three is to fill your bottle caps with whatever fits and matches your papers!


I am a military wife so of course my first try was patriotic!

I found beads, old earrings, chains, stickers, charms, old pins, parts from my hubs shop, pendants, miniatures made from clay.


Step four is pouring your Easy Cast.  This is the best product I found, and I tried a lot of them!  Just follow the directions to mix, fill your bottle caps to just below the rim and enough to cover your bits and bobs.  Easy Cast has a degassing agent in it so no need to worry about those bubbles, just leave them be and they will go away on their own!  Don't forget the tips at the bottom!


Last step!  Add your magnets.  You will need a heavy duty magnet to hold these up! 

I use E600 because I know it is going to work and hold for the long run!


 TIPS

Make sure you get the best prices on your supplies!  Like I said above I paid $5 for 20 when I could have gotten 100 for $7.

After pouring your epoxy make sure everything stayed where you want it!  I use wooden chopsticks to move things around. 

You are going to want to use your chopstick to push down on the paper to make sure you don't get any floaters and to make sure you get the air bubbles out.

LET YOUR EPOXY DRY!!  This could take up to 3 days.  Make sure you have your room at 70 degrees as well.  If the room temperature is not according to the package you will end up with a sticky surface that will never harden!

DO NOT TOUCH!  You will be tempted, trust me!  You may leave bubbles or finger prints behind!

Be careful when gluing your magnets as it will get stringy, you don't want those strings to get on the pretty side of your magnet!

I hope this made it easier and that you give it a try!


Tuesday, September 16, 2014

Simple magnets

Simple and easy to create magnets that will give your fridge or your magnetic boards some color!


Supplies
1" hole punch
scrapbook paper
(I used up some of my scrap pieces)
Scissors
magnets
Foam Brush
Mod Podge
Mod Podge for paper (optional)
GOJO (optional)


First I gathered all my scrap pieces, then I punched out 38 circles.  Why 38?  Because that is how many magnets I had to spare.

Then I layed them all out on my work area, leaving plenty of space between them.  These magnets are pretty strong and will jump to join the one next to it.  If you already have glue on your magnets you will have a mess on your hands (literally).


My table clamp is a great place to stage my magnets.  If you have glue on your hands and are trying to pull them apart it will not be easy.  Another choice is an old cookie sheet.  They are handy for a lot of projects in the craft room!
 

Next, I used regular Mod Podge to glue the magnets to the paper. 

When you have finished go use the GOJO (orange gritty soap) to get all the glue and black from the magnets off your hands.

After it was COMPLETELY dry I trimmed around the edges.


I then stuck them to my cookie sheet and put a light coat of Mod Podge for Paper over the tops to seal them.  I left them to COMPLETELY dry.  Mod Podge for Paper is an option, but you could also use your regular Mod Podge.


After they were dry, I took some for a test drive! You could do so much more with these as well.  You could use inks to distress or stickers before adding the final coat of Mod Podge.


I hope you give it a try! 


Monday, September 15, 2014

Clothes Pin Magnets

Clothes Pin Magnets

I made these to give as gifts and to help organize school papers on our magnetic board.


Supplies

Candy (optional)
Scrapbook Paper
(I use scrap pieces)
Magnets
-Sheets or
GOJO (optional)

Step 1- Get your supplies ready!


I use both kinds of Mod Podge because I have them both.  One or both will work just fine!
 

Step 2- cut your paper pieces to fit your pin.  I traced and cut them a little bigger than needed.
 

Here you can see the pieces ready to be glued together.
 

 Step 3-with the foam brush put a light coat of Mod Podge on the pin.
 

Step 4- Turn the heater on because it is freezing in the Black Hills today (ok so it was 53, but to me that is chilly enough for a heater).  This also may be where your helper has gotten bored and wandered off to do his own project!


 Next set aside the pieces to dry.  Then go wash up with the GOJO!  Seriously this stuff is awesome!  If you have a mechanic type husband he may already have some!


When dry trim the edges.
 

Next you will take your Mod Podge of choice and put a light coat over the paper to seal it.
 

Step Some Number (I've lost track ;)- While the glue is drying trace out your pins on your sheet of magnets.  If you decided to use the roll magnets you will still have some trimming to do.


Now is where I hit a snag!  I thought I had the self adhesive sheets, turns out I had the printer sheets.  So I did a little sanding to help them stick to the pins.  The link above for the sheets are the right self adhesive ones I usually buy.


I then glued the magnets on and let them dry.  When they were dry I trimmed them up and TADA!
 

These magnets are not the strongest by any means, but they will hold a few sheets of paper.  They will work great for holding school papers on the magnetic board!


Sunday, June 1, 2014

Bottle cap crafts

I have finally got through most of this project! It took me a little over a week of trying different products. Once I figured out which product worked most of the time was just waiting for it to dry. This is a long one with lots of pictures to hang in there with me!

I also wanted to do this project completely with things I had in my craft room. The only thing I will have to buy are the magnets to put on the back!

I started out with the bottle caps that a friend helped me save and those that I had saved. It turned out I had about 56 of them and only lost two to a product that didn't work! Not bad huh?

If you want these to be pendants for necklaces you will have to drill a hole for your eye pin. The ones you buy at the store may already have these done for you. 

After you have collected your bottle caps or bought some at the craft store you will need to sand them to help the paint stick. 


After they are sanded you can either spray paint or use acrylic paints. I used acrylic paints as that is what I had.


You will need to seal the paint so that it doesn't peel off. Again, you can buy a spray sealent or like I did you can Mod Podge. Let dry completely! I can't stress that one enough!

After it is dry you will have to cut papers to put inside the caps as your backgrounds. Again, this would have been a lot easier with a circle punch, but I'm cheap! By the time I was done with 56 of them I was pretty good at it! 

Note: today I found caps and a punch for half price at Hobby Lobby!


Then fill with embellishments!


Sorry the next pic is a little blurry.


This is also when you will need to add your eye pin or eye screw. Make sure the hole you made is filled or your resin will leak out. 

After you have filled as many as you can  (I recommend doing large lots at a time as I did above), fill with the resin/glue of your choice. Here are the ones I tried.


I recommend the Easy Cast, you will see why! 

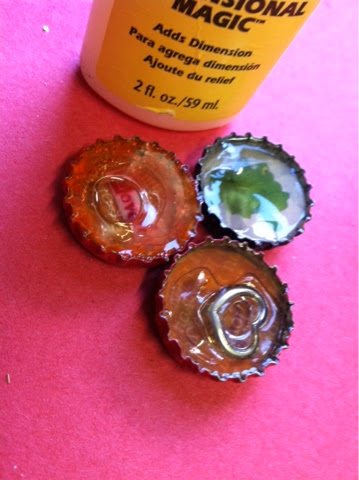
Here I used the Dimensional Mod Podge.


As you can see it didn't work so well and is expensive when you are making as many as I did.  Luckily, I was able to pull these out and reuse the caps!

I tried the Mod Podge and it never dried, again I was able to pull them out and reuse. 

Sadly, the two below I lost to Gorilla Epoxy. It got very hot once inside the metal caps and was full of bubbles. I was not able to save these. I had to open all the windows of the craft room as well.  I will still make them into magnets and use on our board in the house.


Easy Cast was the winner as it has a degassing agent in it.  This means that within the first hour all of the bubbles will be gone! The only downfall to this product is that it takes 72 hours to dry.  I can tell you that they mean this! After 24 it is still tacky.  After 48 the top will still leave marks or finger prints. 72 hours it is fully dry and you are able to touch it.  The other perk is that it is low odor and I didn't need to worry about using it in my craft room. 

Here is the last batch that I just filled today! I would have kept going but I ran out of caps and things to put in them!


Magnets!  If you use E600 please use it in a well ventilated area!


I really had a lot of fun making these and plan to make a lot more! I will try to get individual pictures on te Facebook page as soon as everything is dry and the magnets are attatched!