
I also wanted to do this project completely with things I had in my craft room. The only thing I will have to buy are the magnets to put on the back!


I started out with the bottle caps that a friend helped me save and those that I had saved. It turned out I had about 56 of them and only lost two to a product that didn't work! Not bad huh?
If you want these to be pendants for necklaces you will have to drill a hole for your eye pin. The ones you buy at the store may already have these done for you.
After you have collected your bottle caps or bought some at the craft store you will need to sand them to help the paint stick.
After they are sanded you can either spray paint or use acrylic paints. I used acrylic paints as that is what I had.
You will need to seal the paint so that it doesn't peel off. Again, you can buy a spray sealent or like I did you can Mod Podge. Let dry completely! I can't stress that one enough!
After it is dry you will have to cut papers to put inside the caps as your backgrounds. Again, this would have been a lot easier with a circle punch, but I'm cheap! By the time I was done with 56 of them I was pretty good at it!
Note: today I found caps and a punch for half price at Hobby Lobby!


Then fill with embellishments!

Sorry the next pic is a little blurry.

This is also when you will need to add your eye pin or eye screw. Make sure the hole you made is filled or your resin will leak out.
After you have filled as many as you can (I recommend doing large lots at a time as I did above), fill with the resin/glue of your choice. Here are the ones I tried.

Here I used the Dimensional Mod Podge.
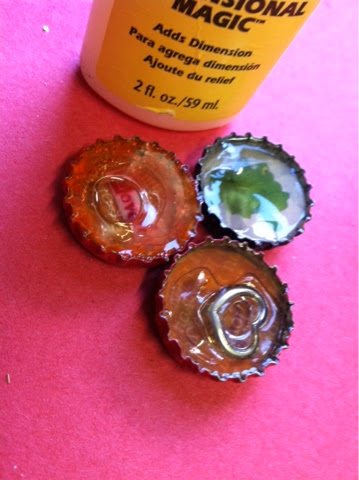
As you can see it didn't work so well and is expensive when you are making as many as I did. Luckily, I was able to pull these out and reuse the caps!
I tried the Mod Podge and it never dried, again I was able to pull them out and reuse.


Easy Cast was the winner as it has a degassing agent in it. This means that within the first hour all of the bubbles will be gone! The only downfall to this product is that it takes 72 hours to dry. I can tell you that they mean this! After 24 it is still tacky. After 48 the top will still leave marks or finger prints. 72 hours it is fully dry and you are able to touch it. The other perk is that it is low odor and I didn't need to worry about using it in my craft room.
Here is the last batch that I just filled today! I would have kept going but I ran out of caps and things to put in them!

Magnets! If you use E600 please use it in a well ventilated area!

I really had a lot of fun making these and plan to make a lot more! I will try to get individual pictures on te Facebook page as soon as everything is dry and the magnets are attatched!
No comments:
Post a Comment