Showing posts with label Mod Podge. Show all posts

Tuesday, October 21, 2014

Binder Clips Upgraded!

Today is a quick and simple project that you can make with some of the supplies that you already had out when you made the Divider Pages that I shared yesterday!  I don't know about you but I love to have all the different papers, but have them all match somehow!


Supplies
Binder clips
Foam brush or your finger
Mod Podge (any kind)
Paper scraps


I cut the paper to fit the binder clip.
 
I used my finger to spread glue on the binder and the paper.


Let dry. 

When completely dry use it! 
 

You can easily add embellishments to these! 


Hope you are liking the blog!  If you are make sure you share it with friends.  You can find me on Facebook and Pinterest as well. 

Monday, October 20, 2014

DIY Divider Pages with Tabs

 I hope you had a wonderful weekend!  Ours was filled with family time and lots of fun! 

Today I wanted to share how I made divider pages for my Tea Encyclopedia.  the Tea Encyclopedia is what I am putting together.  It is all about different teas, their uses and recipes.  As I have said before I am hoping to start a Tea Shop of my own some day!  So let the research begin! 

I didn't want to go purchase tabs, which is a great option, don't get me wrong.  I just wanted them to be custom to my project.

LOTS of pictures so hang in there, I just wanted to show you the best way possible!  Don't look at my colors just the how to!  You make your colors or themes!


Supplies
Folders
 (I used some from a previous project)
Scrapbook Paper (12X12)
Mod Podge for Paper
Scissors
Foam Brush
Embellishments
Tacky Glue
Hole punch

If you have cereal boxes you can cut them to size.  There are a lot of good ways to make the tabs on Pinterest as well!


I cut them in half.  I plan to use the side without tabs as sub folders, so I will make tabs to go on those later.
 
Shhh the J in J. Celeste is Jaime!
 

I then spread the Mod Podge for Paper all over the side, making sure to cover the edges well. 

Flip over and press to the back side of your paper. 

If you get any bubbles simply smooth out the page. 

Trim to fit. Repeat on the other side!

 I have a crate with all of my embellishments separated, you can see in the Craft Hack Blog.  I found my Romantic/Hearts folder as well as my Illustrations and added some embellishments to the folders. I also used the tags from some of my favorite teas!

I used Aleene's but any tacky glue will work.  I would make sure if it is being used daily that you use a good glue! 


Some of the other papers I plan to use! 
Punch holes to fit your binder.  I am in search of a new one as this one was well loved when I was going to school. 


I also used a Tea Tag to make a label for the Earl Grey section.  I will add others as I find them. 

I just opened the tag and put the glue on the inside and placed one side on the front of the paper and another on the back side. 

 
If you are looking for some of the supplies don't forget to check out my store.  It will be on the right side at the top.  Click on JCC Craft Picks!

Update: Check out our Binder Clip Upgrade and make them to match your Divider Pages.

Tuesday, October 14, 2014

Coasters


Hello Tuesday! 

Today's pictures will not be perfect as I was in a hurry to get one coaster done to share with you!  I will upload a finished set as soon as I get it done.

Supplies
Mod Podge
Scrapbook Paper
Hot Glue Gun
Hot Glue Gun Stick
Foam Brush
Foam or Thin Cork
Tiles (Lowes $0.16 each)
Easy Cast (optional)
Stick or piece of cardboard to smooth (only if you use the Easy Cast)


First thing I did was hot glue the cork to the bottom of the tiles and I hated it because the cork was too thick.  Of course, I couldn't find my roll of thin cork so...
I found foam!  Best of all it can match the color of your paper! 


I then placed my tile on the back of my scrapbook paper and traced it.  Cut it!


Using Mod Podge add it to the tile and the back of the paper.  After it dries for a few minutes add a layer of Mod Podge to the top of the paper.


 The next step is optional. but it is the only way you are truly going to make them water proof and not stick to each other when they are stacked.  I put the tile on top of a container just so it was easier to work with and I could turn it without touching the tile.
I mixed up a very small amount of the Easy Cast. I did this because as I said I was trying to get one done to share with you today. But it was a lot easier to do one at a time! 

I then used a wooden skewer to apply the resin and to smooth it out. 

It should self leven somewhat and the bubbles will pop!  The Easy Cast has a degassing agent. 
I did use a little of the extras to seal the edges. 

I will get you a finished picture as soon as I can get out to my shop!  I will try to get the whole set done.  I think I am going to take that cork off and add the foam instead. 

Update!! Here is the finished one with fingerprints because it wasn't completely dry yet! I don't know if I like the brown, so I didn't glue it on yet. 

Tuesday, September 23, 2014

Spoons Everywhere!

 Welcome back, or welcome for the first time!  Boy did you pick a good day to come!  I have been to a wonderful little shop downtown that I had bought a spoon necklace from.  I can't afford to buy them all so I thought I would try to create some that would work perfectly with some of my outfits.


Supplies

Mod Podge
Paper
charms/beads/embellishments
Easy Cast
Grinder
Vise Grip
Acrylic paint (toffee or rust brown)


So the very first thing I want to do is apologize for not taking pictures of my hubs as he used his grinder to cut down the spoon (save the handle!) and as he bent it!  I will get pictures when he does the next round and update this.  HERE is a link to how to do this with a vise grip and hack saw.  They explain it a lot better than I can!


I then cut the butterflies out and arranged them in the spoon.  I coated them with Mod Podge and let it completely dry!
 

I then used Toffee Acrylic paint and brushed it lightly over the spoon.
 

I then used a very damp paper towel to remove some of the paint.
 

I then flipped it over and Mod Podged on some butterflies to the back side.
 

I then added a charm.  As you can see from the picture below it isn't the same one as above.  This is where you get to change your mind, because once you pour the resin it's over!

I then used a pencil to level the spoon and following the directions of the Easy Cast I filled it just to the top.

Close up!


It took about 24 hours for it to dry, because our weather has been amazing and my craftroom was the perfect temperature!  Make sure you check the required temperature on the Easy Cast box! 

I added a chain and done!  Then I went to Goodwill today and bought 16 spoons for $4 and plan on making more!  Just need to get the hubs to help me (he's protective of his tools and shop)!


Monday, September 22, 2014

Planning!

 Hello!  I hope you are having a beautiful Monday.  We are trying to soak up as much sun as we can here in the Black Hills before the snow starts to fly...again.  We had freezing temperatures and snow a week ago and then it shot back up to 90 again!

Because I know winter is coming and I tend to go into hibernation mode (like the Mama Bear I am) I know that it is crucial for me to get my act together.  My ducks in a row!  I looked at buying a planner but $15 for one just seem ridiculous!  So instead I spent $6 and put some elbow grease into it as well as some finds from the craft room and TA-DA, PLANNER!


Supplies
Notebook
ruler
pen
embellishments (optional)
stickers (optional)
Patience (not optional)
Time (one or two eves in front of the tv)
Washi Tape (optional)


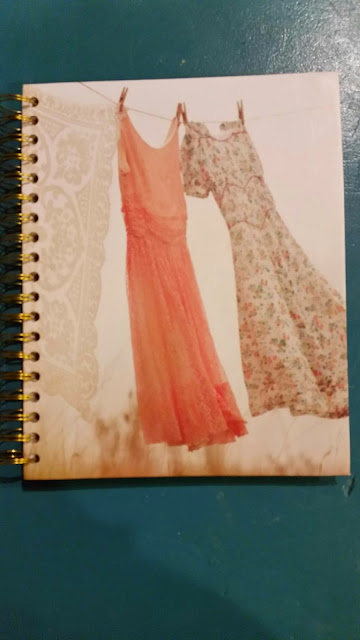
I found this great notebook at Target for $5.99.  Yes, I could have just gotten a cheap $0.92 one, but I wanted it to be something fun that I would like to look at everyday. 
 

Then I stole a ruler from my son (shh I don't think he will get it back).  I figured 4 days on a page would give me plenty of room as well as being able to look ahead a few days.  

It did take me a couple nights to line out my days and add the dates.  I wanted to include the days of the week because I tend to forget what day it is!  There are so many ways that you can do this.  If a grid calendar works better for you-great!  If you only need a few lines to jot something down, even better, and I wish I were you!  Or are you a lister?  You make your list out for everyday so you can get them checked off and done-I envy you!  If you are a lister you may consider using a half page or a page for each day.

I raided the SMASH pile I have saved up and found these two pockets.  Both had the calendar on the front, but I like the back of the blue one better!  So I glued it into the front cover of the notebook with Mod Podge for Paper. I think I paid around $5 for 4 of them, knowing me I probably used a coupon too, so $3 ish.

When I was raiding the craft room I found this note pad and it reminded me of the front of the notebook and a great place for my lists-what I do of them any way!  I will just keep it loosely in the notebook.

I then glued the other pocket to the back cover of the notebook.
 

Of course I had plenty of things to add-the teenager going to his girlfriends, anniversary, bills and of course I will keep track of both of my blogs! 

If you like throw in some stickers or embellish it to make it personal to you!  Most of all make it fun so that you want to use it!